Review – Pentel High Polymer Eraser

When working in the realm of physical creative utensils, it is difficult to have no need for an eraser. From school, to work, to the arts there is more often than not something that needs to be repositioned or removed, and a myriad of good options are available for doing so. Today, I’ll take a quick look at one of those options, the Pentel Hi-Polymer white eraser.

Eraser an test

The eraser itself is about 1 x ½ x 2 ½ inches (around the same size as other erasers of this type, including the Staedtler Mars Plastic) and comes in a cardboard sleeve (the sleeve is more useful than I had imagined, but quite standard). But, of course, the real meat of the question is: what does it erase? And the answer I found was anything I could throw at it. It removed almost all pencil marks with either high or low graphite density, as well as light and medium charcoal. It removed significant portions of Prismacolor pencils and Conte crayons, while heavily smearing grease pencils (China markers). Obviously, up the difficulty scale at inks, it didn’t remove either Micron or Copic marks but did significantly fade the former (aside from a little fading most inks are bulletproof when compared to polymer erasers).

Those results are pretty impressive, and in my comparison are virtually identical to my old standby of the Staedtler Mars Plastic eraser (albeit, the Staedtler had a cool plastic case, which is why I use it), and since the two are essentially the same product, my recommendation would be to use the cheaper or more readily available of them. The Pentel Hi-Polymer eraser is a nice, high-quality consumable that’ll get the job done for just about anyone from amateur to professional.

Advertisement

Review – General’s Compressed Charcoal

As I’ve mentioned before, I haven’t significantly used charcoals in my artwork for most of my “career”, but recently stepped up and created a couple series using charcoal almost exclusively. For this I of course had to purchase most of the basic supplies for creating a charcoal drawing. As it happens, General’s produces a wide variety of inexpensive and readily available art supplies and they were the first ones I ran into when looking for compressed charcoal. I expected them to work, but not be anything spectacular. Was I right?

img_0142

The set contains 4 sticks of charcoal that have been broken down and then compressed with a binder in 4 different hardnesses (2B{x2, in my pack}, 4B, and 6B). Each creates a relatively smooth and richly dark line that is very easy to smear and blend but very difficult to erase. The softer sticks do indeed create a darker and more consistent line but unsurprisingly seem to disappear in your hand while you’re using them. When compared to the “natural” vine charcoal these darker and more difficult-to-erase lines serve a different purpose: they are for further on in drawing’s development, when you are beyond the sketching stage and have most of the structure of your image created.

img_0144

In my experience, these General’s sticks performed adequately. They were certainly darker and smoother than cheaper ones found in “sketching kits” that you can buy at department stores. However, they do still go down in a bit of a “chunky” pattern and aren’t true black. There is also a bit of a problem with breaking, but that’s just par for the course with this type of product. If you’re used to crayons, you’ll have to be very careful when handling these, or you can be like many artists I’ve seen and “pre-”break them in half before actually using them, which also makes it easier to get in close and work on detail areas.

img_0147img_0146

These guys pretty much keep pace with a lot of General’s products. They work well, are easily available, and don’t break the bank (though they’re actually closer to the top end of the price spectrum in this case). They are a fine solution for people at all skill levels with the studio space to set up and use charcoals.

Review – Dick Blick Medium Vine Charcoal

I must admit before I start here that I’m not really one for charcoal as a drawing medium. It requires a fair amount of space that it’s alright to be perpetually stained with black. So, you basically need studio space in order for it to be at its peak performance, and I do not have studio space. But, I can take art classes, and that is where most of my experience with vine charcoal comes from. There are quite a few places to buy it cheaply, and the manufacturing process is probably one where it would be difficult to weed out natural inconsistencies. From my experience with several different brands, I have a hard time really telling the difference; but the main ones I’ve gone with is a set from Dick Blick, mostly because they were the last ones I was able to try out.

IMG_0134IMG_0139

Vine charcoal is a particularly finicky type of drawing medium that goes down smoothly with a rich black color, and wipes away to nearly nothing with a hand or a cloth (though, if applied directly to paper, even an eraser won’t be able to remove the last ghost of a line). The sticks themselves are essentially raw: they are just vines that have been charred. Most sets (including this one) give you a pretty good selection of widths, all at around the same length. Even the girthiest of these break quite easily and most artists break them down a more manageable size both for this reason and to make manipulating them easier (I personally don’t for the most part, but then again I am persnickety). This particular set performed well. I was able to sketch with ease and clarity, while erasing and blending quickly and as cleanly as possible (and the dust trapped in my cleaning cloth made excellent shading powder in other drawings).

IMG_0141


Blick offers a wide range of relatively inexpensive products of quality along with their brand-name selection. These fit in nicely and will get the job done. If you’re already ordering art supplies and want some vine charcoal I’d certainly recommend this (or if Blick is actually your local store)(shipping would probably be too much to make this worth ordering alone). And while there certainly may be better charcoal out there somewhere, you won’t have any problems practicing or finishing drawings with this stuff (just be sure to get a fixative if you don’t want it to disappear).

Review – Muji Portable Scissors (35mm)

Scissors are one of the most useful tools the average person can have at their disposal. And, until I began looking for a more “travel-safe” option, were the main reason I kept a Swiss-Army Knife in my pencil case. My quest for an option that was a full scissors without a knife attached eventually led me to Muji’s minimal, compact, spring-loaded design. But how well do they actually shape up?

IMG_4054

When the cap is on, the entire device is a 4½ inch cylinder with a diameter of a little over a half inch and a thin wire clip attached on one side. The clear plastic cap is about 2½ inches in length. It snaps over a small ridge in the handle, and has an inner cylinder to keep the point of the scissors roughly on track. When it is removed, the scissor springs open using a wire spring mechanism and the white handle portion splits into two (with roughly 1/3 and 2/3 of the volume in either handle). There is virtually no written information on the entire device, save for a warning in Japanese (which I can’t read, but it has a caution triangle).

IMG_4055

Despite only having to do two things, the functionality of this little guy is slightly underwhelming. The clip is far too tight to be useful in most situations, though it doesn’t have any sharp edges that might cause catching or tearing. And the default sharpness of the blades is basically tolerable. They cut paper, tape, and blister plastic just fine (so more than 90% of situations are covered), but they struggle with cloth or more cellophane type plastics.

IMG_4053

These little guys are probably the best set of folding travel scissors I’ve found that haven’t been attached to a multi-tool. They’re relatively compact, substantial feeling, and efficient, despite being unergonmical and lacking significant cutting power. Sometimes the spring is a bit overzealous, but it’s a convenient feature since there are no finger-holes and I like having a body that doesn’t feel like it’s going to shatter every time pressure is applied to it. If I could, I’d still probably want my old Victorinox (multi-tool) scissors back in my bag, but as a portable, checkpoint-friendly option, these guys get the job done fairly inexpensively and without having to fold out stupid finger-holes.

Review – Copic Ciao Markers

Copic Markers are a professional artist’s staple and set quite a high bar in terms of how a marker performs. I personally don’t have the skill to utilize them effectively, but I have seen the wondrous products of many who swear by them. Getting to that level takes practice, and while one can learn with other markers, it’s never too soon to get attuned to the markers you intend to be using for a long time. That’s where the high price-point of Copic markers really starts to become a problem. To build up a library of the markers would cost hundreds of dollars, and when starting out one doesn’t know what tints and shades they need or prefer (the markers are refillable, thankfully, but that doesn’t change the upfront cost, just the upkeep). There is a budget option, the Copic Ciao, which at $4 are a dollar and change less expensive than their bigger brothers, but that price is still up there. Are they worth it?

photo 1-78

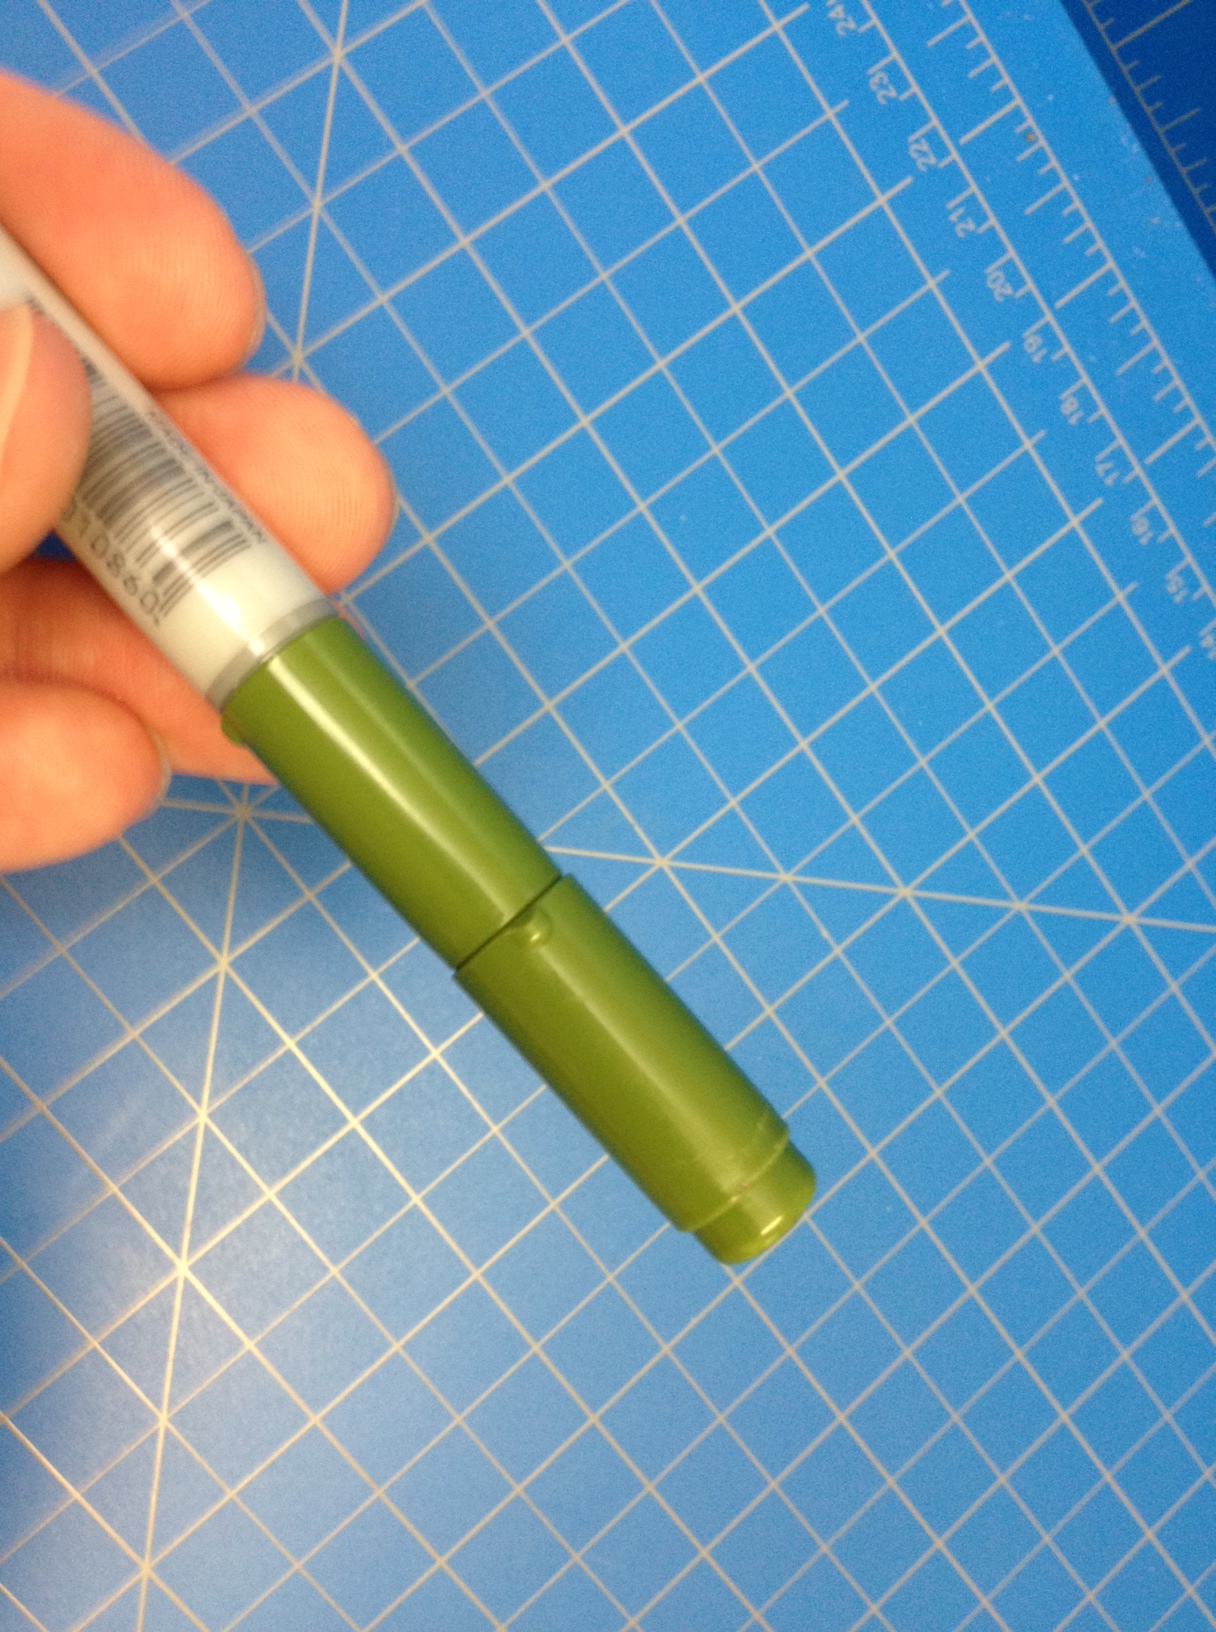
The markers are roughly cylindrical with a ⅜” diameter. There is the smallest of bulges in the center for the purposes (I assume) of aiding grip and disincentivising rolling. On either end there is an inch-and-a-quarter long color-coded cap with a quarter-inch step down on the end that allows either cap to be posted on the other. Near the base of each of these caps there is a small nub that makes it easier to remove and also helps prevent the marker from rolling. Each tip has a butte-esque taper leading from the body to the felt “brush”. The chisel tip is molded in the same plastic as the body, while the brush tip (the one you’ll most often be using) is a darker plastic that extends to an easily visible band underneath the cap. Which ends are which, what color the ink is (both descriptive and in code), and every other needed piece of information is nicely printed on the sides, and it appears underneath a shiny finish to prevent wearing with use (after all, these markers can be refilled).

photo 5-26photo 3-70

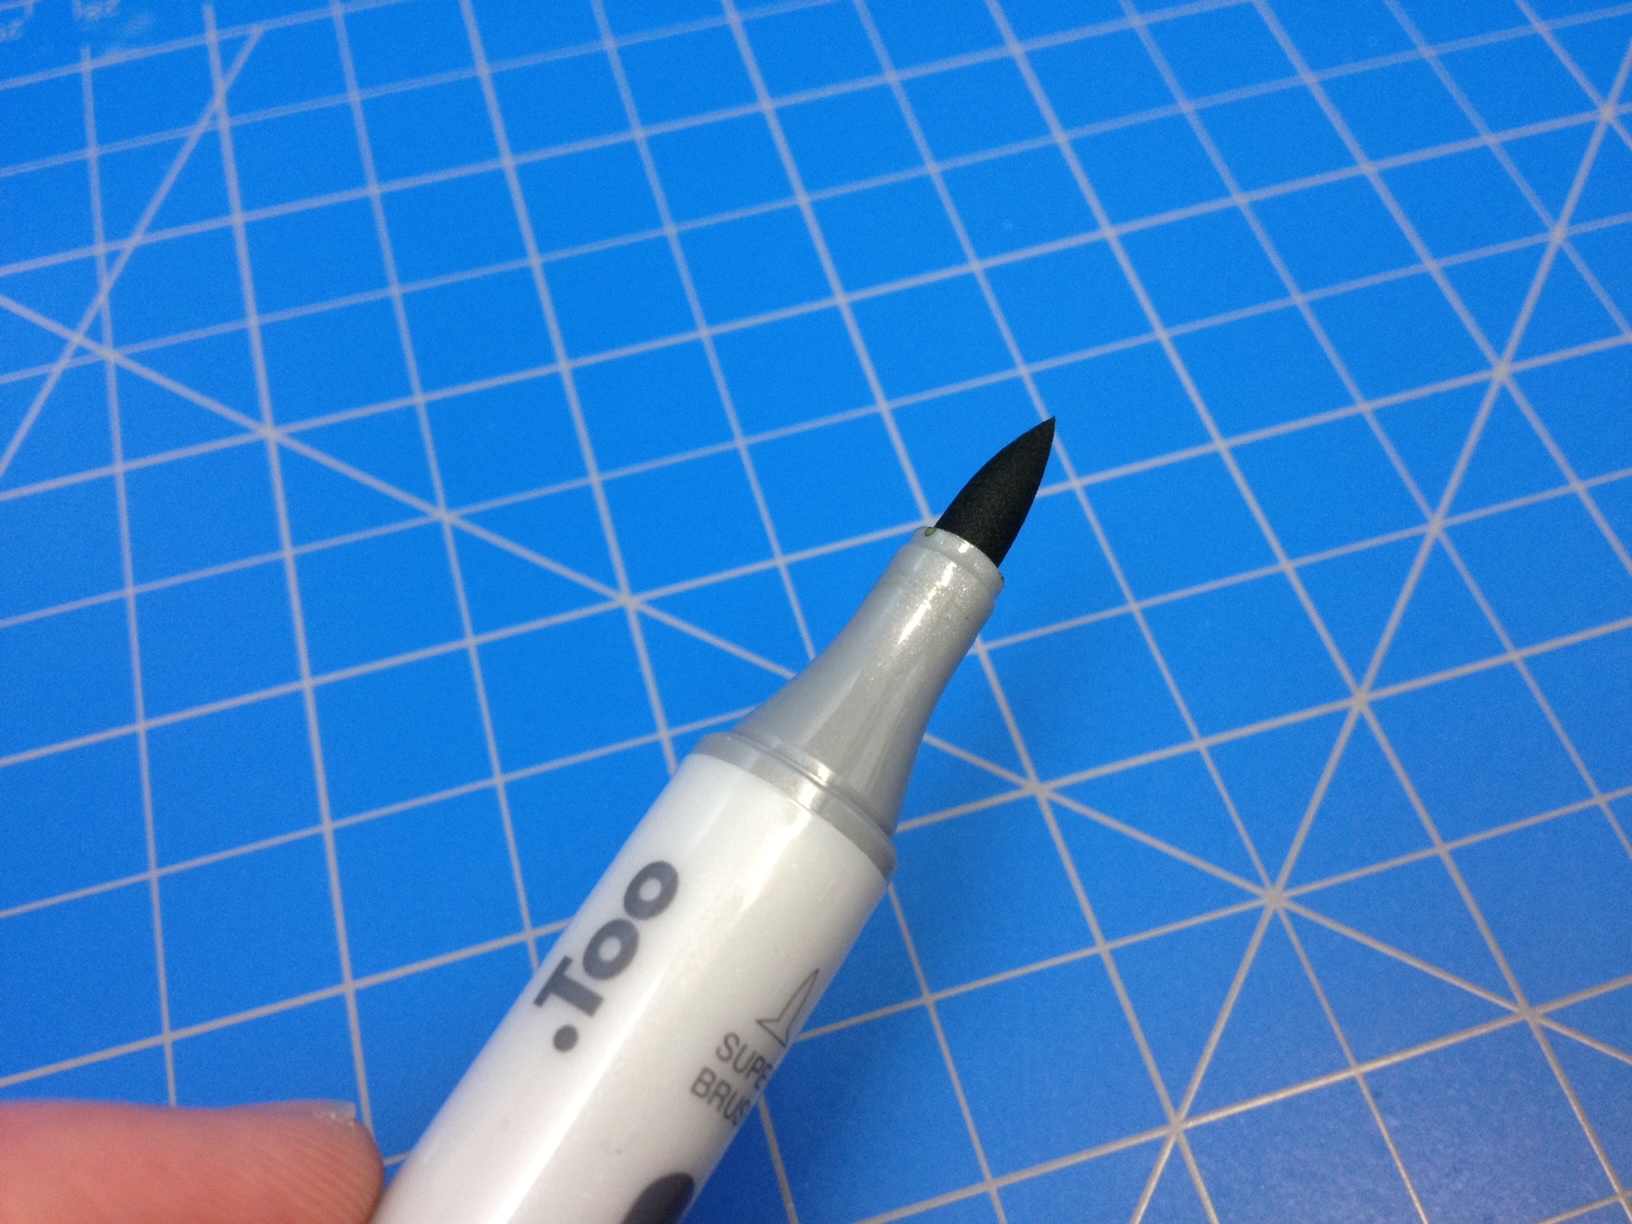
I’m not an expert when it comes to actually using these (or any) markers, but a quick search online of what people are able to create speaks for itself. What I can say is that the tips are well-made and hard-wearing (and they’re also replaceable, decreasing future expense). The chisel is sturdy and unyielding while the brush easily bends to create lines ranging from 1/32 to ¼ inch. The ink is alcohol-based and goes right through absorbent papers, feathering and drying quite quickly. It’ll still bleed through fairly heavy and high quality papers, but it doesn’t dry as quickly, allowing it to be blended more easily either with other colors or the colorless blender (which, as far as I can tell, just contains alcohol). Once down, the ink is essentially impervious to water and alcohol-based attacks, but they are sensitive to sunlight (as per their website) and, being solvent-based, aren’t the most “archival quality” things in the world.

photo 4-61

In my opinion, even forgoing the financial difference, the size and shape of these smaller Ciao markers is just more comfortable and easier to use. And they allow an artist to build up a collection of various colors in a much more consolidated space if they are willing to lose the color labels on the end. But they’re still expensive, and getting them won’t make you a better artist or a blending magician (as I can attest to). If you’re unsure if you want them or can utilize them I’d recommend starting out with only a few (greys would work best in this scenario) and getting more as you need them or improve your skills (the sets are quite expensive, especially if you end up not using them). But the bodies will last forever and the refills/replacement(s) (felt tips) are fairly easily available and extend the life of the marker significantly. This is a fine (and for some superior) version of a marker that is trusted by professional illustrators around the world.

Review – Staedtler Mars Lumograph Pencil (F)

“I use these specifically, because I like the nice blue,” is a bit of a paraphrase from a former instructor of mine when discussing what pencils to get for sketching or other artistic purposes. The main gist of this discussion was that it really comes down to personal preference, since there are so many different pencil brands that all make quality products. Aesthetics are important, and Staedtler is known for their deep blue coloring (as well as their quality craftsmanship), and that’s part of what makes the Mars Lumograph iconic, but is it what you should be using (specifically in “F” hardness because I like my pencils a little bit on the hard side)?

photo 1-69

The body is a standard hexagonal shape, with a similar size to your average writing pencil. A deep blue covers almost the entire pencil, save an end cap that is black and a white band just beneath it. On the end cap the hardness is stamped in a silver ink on all 6 facets, and the main product information is rendered in the same color on the back two thirds of the blue area. Opposite this facet a product number and bar code are printed in white.

photo 3-62photo 4-56

This pencil doesn’t really have any fancy features; like most sketching pencils, it doesn’t even have an eraser. But what it does have functions superbly. The wood is light but sturdy (no splintering) and the lead well centered (no weird angles or breaking because of sharpener issues). The lead itself is wonderfully smooth, even with my preference for firmer feedback.

photo 5-23

And that really just affirms the idea that started this off. The Lumograph is a good pencil, it can take a beating and keep on sketching. The materials are good, and the assembly is what you would want. But, aside from it being good quality and easy-to-find, there isn’t a real reason to recommend this over another drawing pencil. If you like the blue, definitely go for them. If you think blue is better than the other choices (black or green in most cases), also take a look. If you’ve been with the brand forever or just find there’s something about the feel that you really enjoy, there’s no reason to turn away.

Review – The Fine Touch 3-Brush Set (1-,2-, and 3-inch Flat)

I’m not a painter, or at least, not very often. Painting is expensive, time consuming, and space requiring. But nowadays there are budget products that are easing the “pain” a little bit. Bopping in to your local superstore and buying a set of brushes with a canvas or two for less than $20 is incredible. And “The Fine Touch” is one of the more visible brands (in my area at least) selling inexpensive painting supplies, like a set of three 1-inch increment synthetic brushes. Do they really work though?

photo 1-68

Despite the common wisdom for years being that natural hair brushes are superior to synthetic nylon ones, they have made some improvement in quality over that time. I don’t know if the best synthetic brushes are better than the best natural ones, nor would I claim that these are better than any other brush, but I personally prefer the little extra “bounce” the nylon provides, and they’ve worked quite well for me over several painting projects.

photo 5-22photo 4-55

The basic structure is the same as virtually all paint brushes: a wooden handle with information printed on it (varnished in this case) shaped like a paddle with a ferrule on one end that holds in a set of bristles. Conveniently, these also have a hanging hole at the end for easy storage. Everything about them is cheap; the wood is lighter than the bristles, with brush strokes in its finish and burs on the drill holes; the ferrules are a flimsily metal (which will likely rust) that has either cracked or slightly splintered each handle in the fastening process, and the bristles have a bad habit of falling out during the first few uses.

photo 2-67

So obviously they aren’t “forever” brushes, but for what they are (cheap superstore brushes) they are entirely adequate to paint with. If you only have a couple projects, just want to get some paint down, or feel the need to ease into things you might not know you want to do “forever”, then they will work just fine for that. You won’t become a master using these, and you might get frustrated with the bristles in your paintings, but they work, and for just getting started, that’s enough.

Review – Crayola Erasable Colored Pencils

I’ve looked at Crayola’s regular colored pencils in the past, and I’ve been known to go into far too much detail about the color and quality of what are ostensibly children’s products. In this review of Crayola’s erasable colored pencils I will be concentrating on the “gimmick” as opposed to the colors (in other words, I won’t be looking at the 24 colors from my box individually). So, do erasable colored pencils do as they say on the tin?

photo 1-66photo 2-65


First, a quick note about the aesthetics, which have changed from your standard Crayola pencil. These retain their round form with the addition of a ferrule and color-coordinated eraser at one end. The name of each of the colors is printed on the barrel, but not embossed into it, and little white designs have been added to the front and back over the color-coded label. Each one also has a large uneven white patch in the middle containing a couple logos (and “f6b”, which I assume is the hardness). I think this re-design is poorly conceived, but it is a product for children, and doesn’t affect the use of the pencils.

photo 3-59photo 4-53

When put to paper, the pencils feel a bit more waxy than the standard set. It’s a kind of unnatural and unpleasant feeling with the colors being a little more faded and uneven than the regular pencils. There is a little bit of blending that can happen, but it is splotchy and sometimes one simply covers another (I didn’t test with mineral spirits for blending, so I don’t know how this formulation would react). And finally, the erasability is… better than one might expect. All of the colors erase to about the same degree, which is not totally, but there is only the faintest wisp of color left on the page. It’s pretty comparable to erasing your standard graphite pencils, and it seems to work with most erasers (even gum ones, though they don’t work as well), not just the strange cheap ones that come attached to the back of the pencils.

photo 1-65photo 2-64

So yeah, they work essentially as advertised. It’s not the best erasing experience but it beats not ever being able to change a mistake, and that, combined with the better blending, makes these, in my opinion, the better artist’s tool. But they’re still not comparable to higher-quality artist pencils. At school or whatnot, these work especially well as map colors (unfortunately, probably the most common use of colors in school), allowing you to fix minor mistakes. If that’s the kind of thing you’re looking for, these definitely fit the role (and they’re a couple bucks for 24, which is super cheap).

Review – Pilot Opt (.5mm)

It’s always surprising how many innovations there can be for something as (seemingly) old, tried, and true as a mechanical pencil. The Pilot Opt is a fairy traditional and comfortably chunky mechanical pencil save for its unique advance mechanism. While a standard click-mechanism is available and quite usable (and necessary for retracting), there is also a sliding weight inside that allows the pencil to be shaken to advance the lead. But is this shake advance mechanism (that I don’t fully understand) a real improvement over the standard, or just a gimmick?

photo 1-17

The body of the pencil is fatter than the average mechanical pencil and relatively torpedo-shaped, with the thickest part being around two-thirds of the way toward the front and tapering down from there. Forward of this hump there is a (removable) rubber grip section and a metal cone, attached to which is a smaller metal cone that serves as a lead pipe. As far as I can tell, the farthest this pencil can be taken down by the user is removing these two bits, which gets you nowhere. Behind the grip section is a clear piece of plastic with a colored checker pattern (which is black, trying to mimic a “carbon fiber” look. Other syles come in other colors) below this, you can see the black tube containing the advance mechanism. Behind that is a correspondingly colored opaque plastic bit that contains just enough printed information about the pen and holds the attached spring-clip on a pivot. At the very end of the pencil is a(nother) correspondingly colored translucent plastic eraser cover, under which is a small white eraser that can be removed to access the lead tube.

photo 4-13photo 3-13

The lead and eraser are what you would expect from Pilot: that is, quite serviceable. The lead is a fine .5 and the one included feels like an HB. It’s a medium hardness and quite smooth, nothing to write home about but nothing wrong. The eraser gets the job done but like many mechanical pencil erasers is entirely too small (in my opinion). This is offset slightly by it not being they type that disappears easily. The push click mechanism is usable and gets thing done, but is a little underwhelming. And the clip is great, being smooth enough to not damage items but strong enough to hold on firmly, while the spring mechanism makes it easier to use and harder to break. But obviously the main attraction is the shake advance mechanism, which works as advertised. A good shake will advance enough lead for one to be able to write, though it might take two to get to a length most people are comfortable with. The advance per “shake” is comparable to the advance per “click” with minor length differences depending on some ethereal power (likely gravity and the external forces you apply). And the weight inside needs to reach both extremes in a short period of time with some force in order to advance the lead, this means that accidental advancement is a rare occurrence, but when intentionally done can be a surprisingly subtle gesture (though it’s still violent enough that people might give you strange looks). I haven’t had it advance in my bag, yet it’s always done so easily when I was using it.

photo 2-14

Without its gimmick this is still a solid pencil, though one could argue that its ¥200 (≈$1.75) price tag isn’t worth it without the shake advance (the same for its increased US price of $3.00-3.50) but even then it’s right on the line for the quality (though I wouldn’t get it without the mechanism because of its thickness). But with the mechanism it becomes a fascinating and usable utensil. The grip is comfortable, if wide, the lead and eraser are of quality, the clip is a step up, and the mechanisms work wonderfully. If you’ve been looking for a more convenient advance mechanism and other options like side advance aren’t doing it for you this is certainly something to look at. And while I probably wouldn’t have bought one for myself (it was a gift from my brother when he went to Japan), and indeed I won’t be keeping it in my daily use pencil bag, I had a fun time with it all throughout my testing.

Comparison – Wite Out Quick Dry/Extra Coverage/Super Smooth

Previously I’ve compared the two major brands of correction fluid: Liquid Paper and Wite Out. Back then I didn’t take a look at the fact that Wite Out comes in a few different kinds (but there is one that is basically “regular”), so I’ll attempt to rectify that this time. Now, the various “flavors” of Wite Out do go in and out of production, with the majors being “quick dry” (regular) and “extra coverage”. I also have a bottle of “super smooth” that I picked up second hand and surprisingly still works (it’s old enough to have the previous graphic design) but that type is currently out of production. How do they compare?

photo-1-2photo-1-1

Quick Dry – The standard of correction fluids and one that I’ve looked at before. Quick Dry is fairly “standard” in properties; it dries shiny and little warm in hue (yellow-ish). It is a bit finicky and tacky, sometimes making it difficult to get a smooth finish with multiple strokes. It covers regular pen, pencil and stray marks well (though it sometimes leaves a divot where the ink “repelled” it. But on darker lines like those made by Sharpies it only minimizes the effect.

photo-4

Extra Coverage – The other currently (easily) available Wite Out, Extra Coverage is smoother, dries matte, and is colder (and much more white) in hue. From my experience it layers well, always being fairly flat, even minimizing visible strokes. It covers pens and permanent markers with ease (though it’s still got that weird divot displacement thing going on) but doesn’t blend in as well with the paper. And, though I did no super thorough testing, it actually seems to dry faster than the “quick dry” or at least not remain tacky as long, but that could be because my “quick dry” bottles are older.

photo-2

Super Smooth – Being no longer available I have no idea what a “brand new” bottle of Super Smooth would be like, but I would hope it’s better than what I’ve got here. The bottle is old enough that it has a brush (not a sponge) applicator, and that’s not an asset since this particular type is very fond of clumping up. It’s visually similar to “quick dry” but more matte, and it doesn’t cover nearly as well (it just makes things look kinda hazy) forcing one to reapply it, causing many clumps and visible brush strokes. It dries much slower than the other two as well (maybe that’s why it lasted this long) and while it may be “smoother” in the technical sense I don’t see that as much of a positive either in the abstract or the comparison.

photo-3photo-3-1

If I had to pick a winner it would be “extra coverage” as the only flaw I see in it is that it doesn’t quite match the color of the average sheet of paper. The “regular” “quick dry” is still a good product but one I will be using less often now. It depends on whether or not you want the correction to blend in or completely cover up the mistake. But if there is one thing to take away from this, it’s that I now understand why “super smooth” was discontinued.