Review – Stabilo No. 288 Exam Grade Pencils

Every time my brother goes on an international adventure, I get to reap the rewards by looking at writing utensils from another country without the hassle of actually having to visit that country. Now, Stabilo is a company with many products available in the US or easily shipped there, and the subject of this review, the Exam Grade No. 288 2B pencil, can be found and purchased here, but when you compare prices and availability it’s obvious it’s really meant for foreign markets (mine cost 36 {probably less} Thai Baht {or a dollar and 3 cents} for three pencils when compared to $3-7 on eBay or Amazon plus shipping). Is there a reason to chase them across the world or are they just Paper:Mate equivalents?

photo 2-13

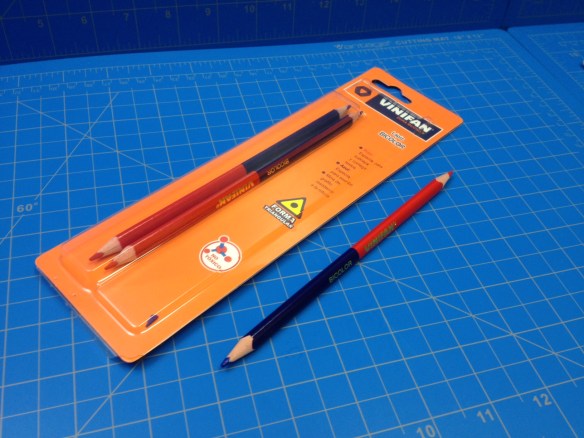
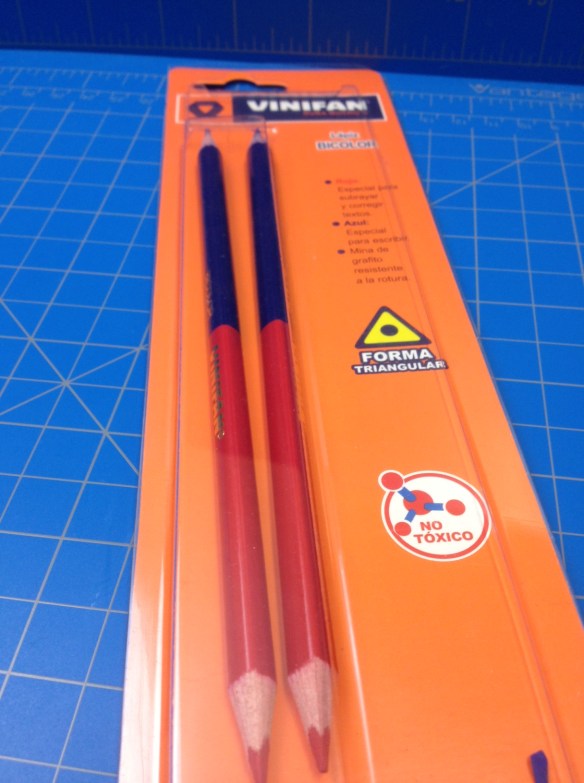
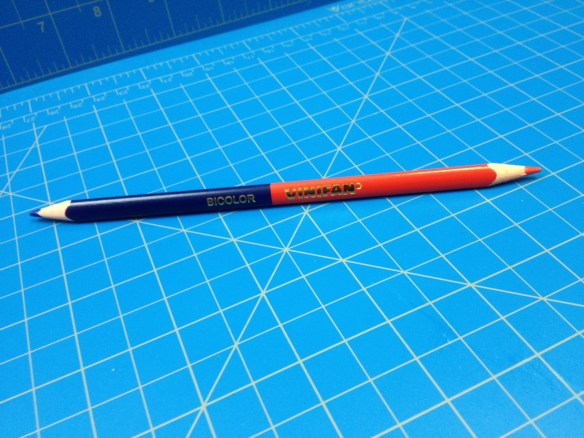
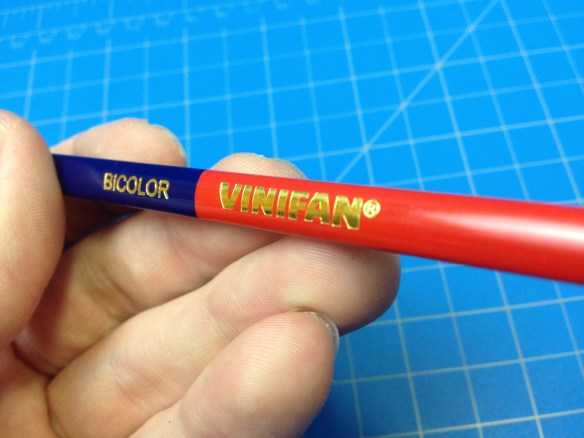
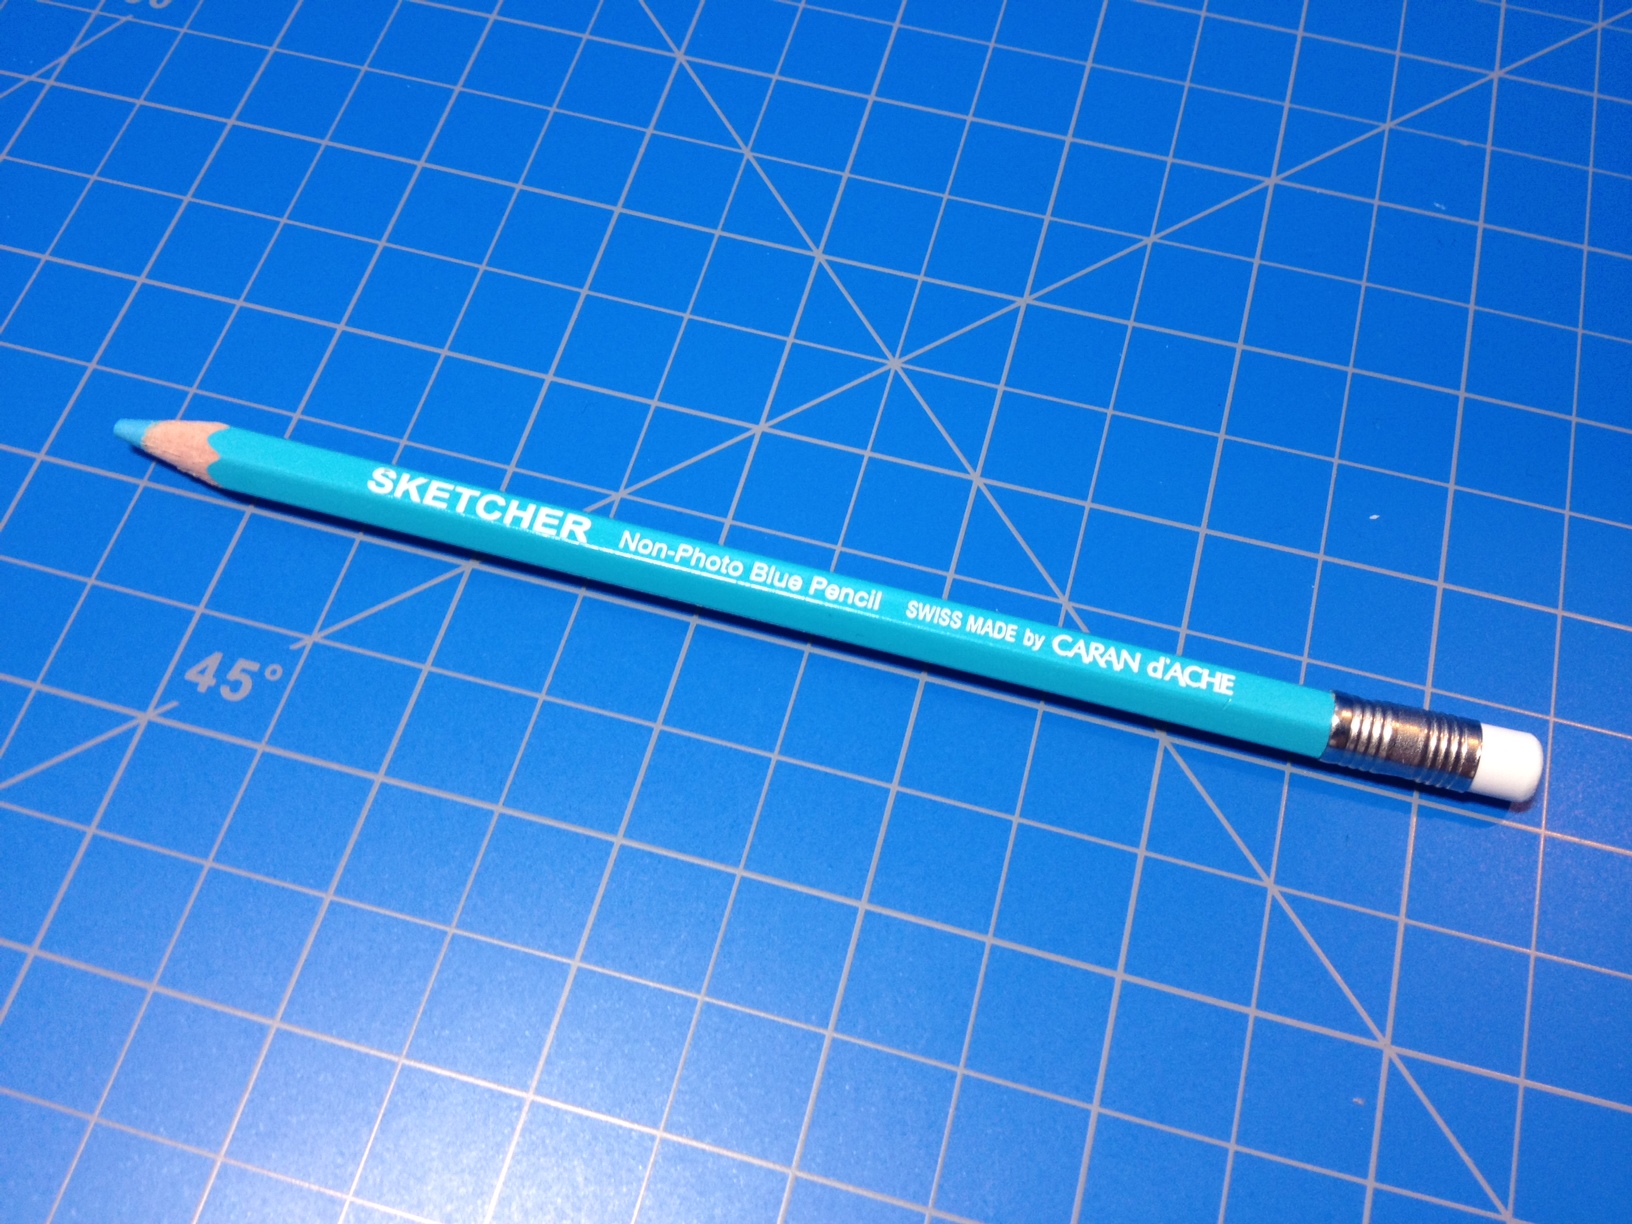
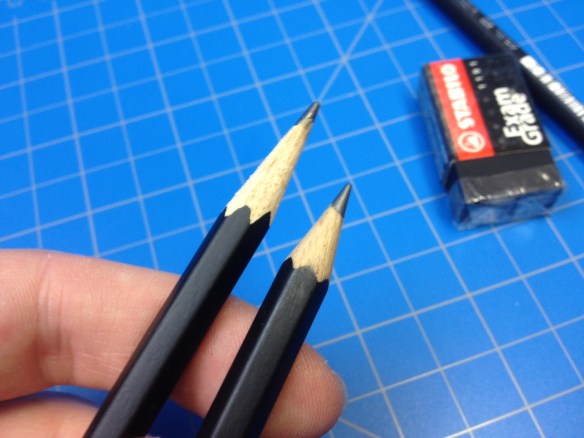
Most of the information on the package is in Thai, a language that I unfortunately don’t speak or read but have enough objects displaying it around my house that I can instantly recognize it. The pencils themselves are all in English, though, so for someone like me identification and re-ordering would be an easy thing to do. They’re a standard wooden hexagonal design with a black matte finish until the final ¾”, where there’s a glossy white band followed by a glossy red “cap” of paint. No eraser is affixed; instead, a separate eraser is included in the package. On two opposing facets of the body all of the necessary information is printed (poorly) in a silver ink and ever-so-slightly stamped (there’s also a barcode in white).

photo 3-12

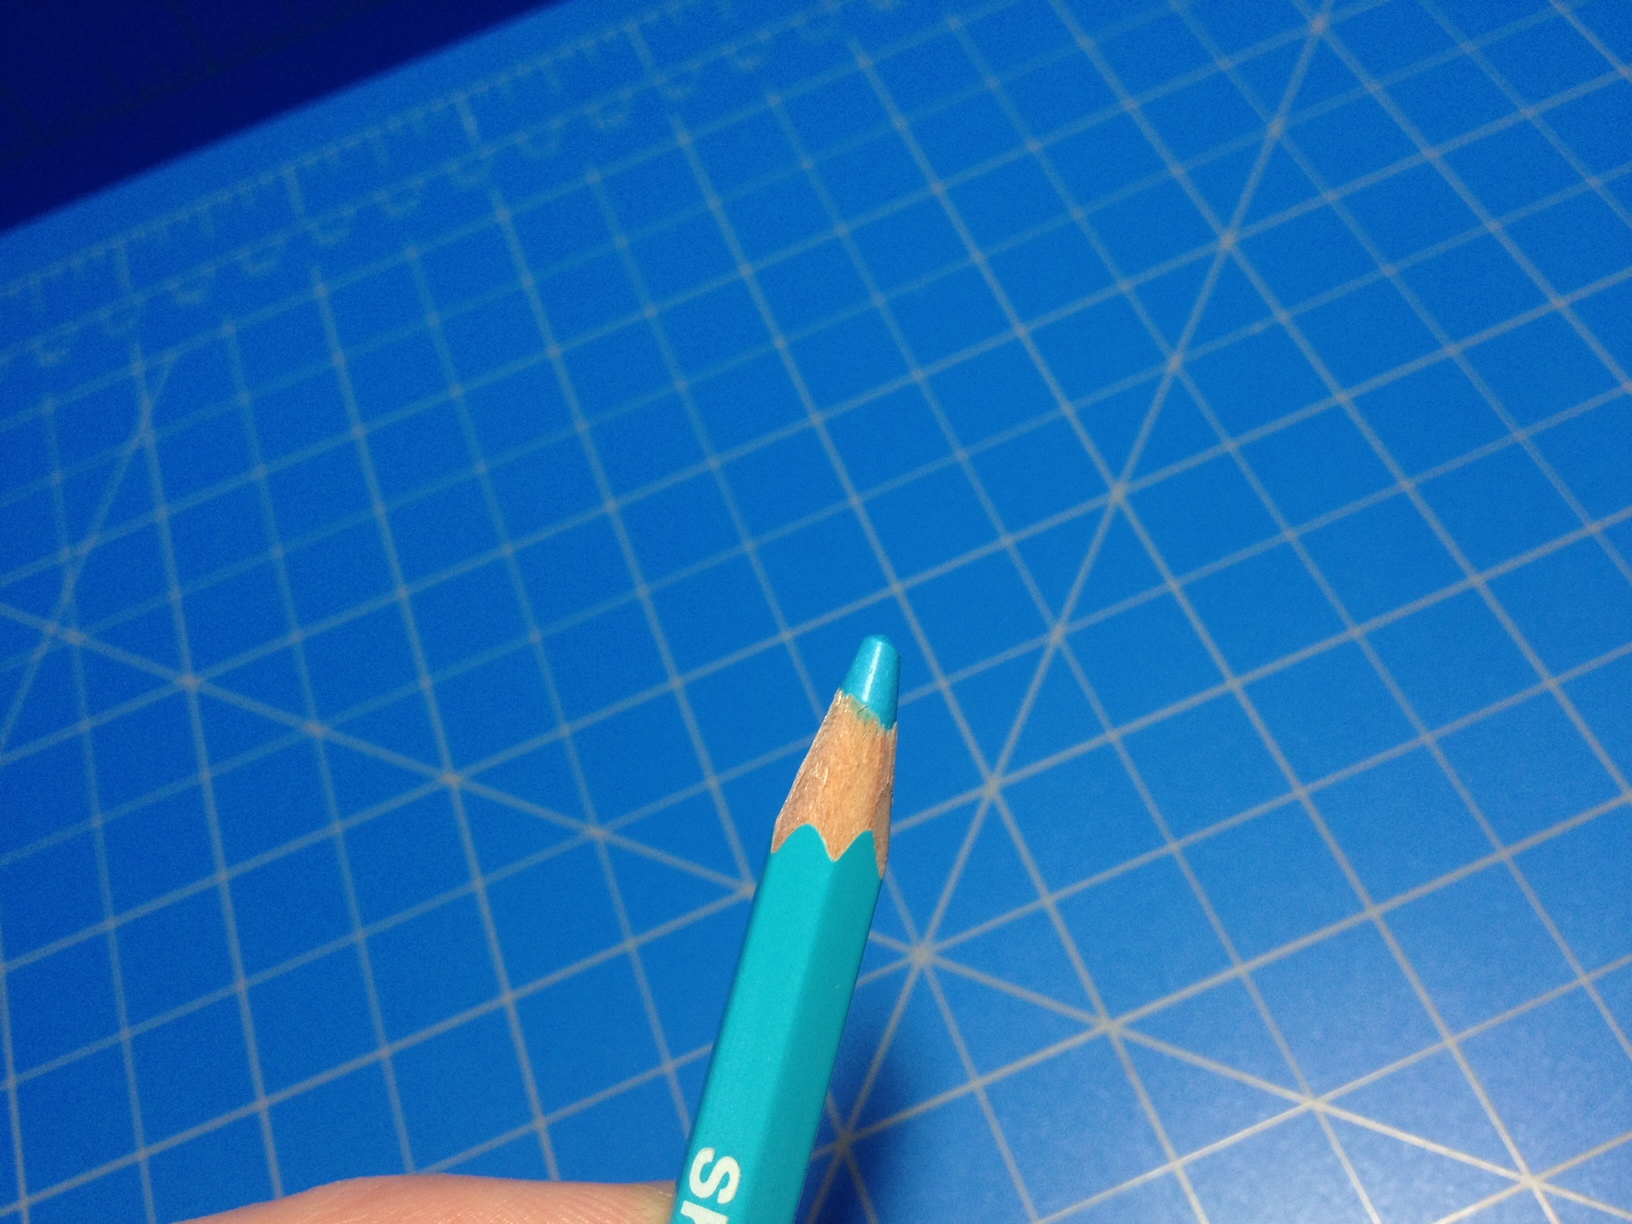
Performance is pretty par. Supposedly, these are pencils meant to take school tests with, and I would say they do a good job of that. The wood isn’t great quality, but it’s light and sharpens easily. The graphite is on the darker side being a 2B (an unusual but not unheard-of hardness for US school pencils). It looseits point quickly but makes a darker mark, something I’m not a fan of, but is good for filling in bubbles on a scantron (or something similar). The black eraser comes in a card sleeve where all of the information is also in English. Supposedly it’s “specifically designed to erase scan sheets cleanly with minimal eraser mess” (and a bit of paraphrasing). And it’s not bad. Light marks are erased easily and darker marks passably, and the eraser shavings do clump up to create less mess. It also doesn’t seem to disappear right before your eyes as you use it. It’s far from a perfect eraser, but it (the 1191) is at least comparable to the standard pink erases that are so easily found.

photo 4-12photo 5-5

As far as quality is concerned I’m not going to be running off to Thailand anytime soon to track down a lifetime supply. They’re competent but not excellent everyday/school pencils that are inexpensive and usable with a few subtle changes when compared to their counterparts in the west. If you should ever find yourself in Thailand or any area that sells them (perhaps you live there) they can easily be used for most daily tasks, but they’re nothing to write home about.

Review – Vinifan Bicolor Colored Pencils (Triangular)

I don’t know about anyone else, but I certainly have memories of being fascinated by double-ended colored pencils. I actually might still have my first one around somewhere because, even though I ended up with a couple different ones in my pencil pile™, there just wasn’t much use I could find specifically for a double-ended colored pencil. But the box for the one I’m looking at today, the Vivifan Bicolor, has (as best I can make out since I don’t read Spanish fluently) listed uses for each side of the blue and red pencil. The blue side is for “writing” and the red side is for “correcting” (escribir y corregir respectivamente), but is that really a good use scenario?

photo 1-18photo 2-15

Like a few other Peruvian writing implements I’ve reviewed recently, the Bicolor has a rounded, triangular body that helps with grip and prevents it from easily rolling off the table. It’s painted red and blue on the sides corresponding with the color of the lead, coming together in the middle at a surprisingly straight line (I don’t know if that line exactly corresponds to the leads, though). Near the center, stamped in gold letters, are “Vivifan” and “Bicolor” which is enough, but I would’ve liked some more information.

photo 3-14photo 1-14

In the package, the points are very cheaply made with 3 flat cuts, but they are usable (though the points were broken or blunted on some of mine during the trip from Peru to the USA). The writing has a more-or-less standard, waxy colored pencil feeling. Coverage is pretty good when bearing down (the blue covers slightly less completely than the red), and at normal writing pressure they are darker than the average colored pencil. But, in my experience, they become unsightly and uncomfortable after only a few words. The fire-engine red and navy blue colors are unspectacular and almost non-differentiate-able from Crayola orange-red and blue pencils, but they get the job done. Both the waxy-ness and the not-good-for-art colors provided help lead to the very standard problem with inexpensive colored pencils of them not blending very well, but the packages says they’re for writing so that’s less of a concern.

photo 4-14photo 5-8

I’m still not really sure what I would use this for. The red side is good for marking corrections to be made, but the blue side is not good for writing. The color set is too limited for most artistic applications and the difficulty there is compounded by the inexpensive waxy-ness. Still, if you’re looking for a space-saving or easier-to-keep-track-of way to have both a blue and red colored pencil with you, this would be a perfectly adequate (and comfortably designed) way to do that.

Review – Pilot Opt (.5mm)

It’s always surprising how many innovations there can be for something as (seemingly) old, tried, and true as a mechanical pencil. The Pilot Opt is a fairy traditional and comfortably chunky mechanical pencil save for its unique advance mechanism. While a standard click-mechanism is available and quite usable (and necessary for retracting), there is also a sliding weight inside that allows the pencil to be shaken to advance the lead. But is this shake advance mechanism (that I don’t fully understand) a real improvement over the standard, or just a gimmick?

photo 1-17

The body of the pencil is fatter than the average mechanical pencil and relatively torpedo-shaped, with the thickest part being around two-thirds of the way toward the front and tapering down from there. Forward of this hump there is a (removable) rubber grip section and a metal cone, attached to which is a smaller metal cone that serves as a lead pipe. As far as I can tell, the farthest this pencil can be taken down by the user is removing these two bits, which gets you nowhere. Behind the grip section is a clear piece of plastic with a colored checker pattern (which is black, trying to mimic a “carbon fiber” look. Other syles come in other colors) below this, you can see the black tube containing the advance mechanism. Behind that is a correspondingly colored opaque plastic bit that contains just enough printed information about the pen and holds the attached spring-clip on a pivot. At the very end of the pencil is a(nother) correspondingly colored translucent plastic eraser cover, under which is a small white eraser that can be removed to access the lead tube.

photo 4-13photo 3-13

The lead and eraser are what you would expect from Pilot: that is, quite serviceable. The lead is a fine .5 and the one included feels like an HB. It’s a medium hardness and quite smooth, nothing to write home about but nothing wrong. The eraser gets the job done but like many mechanical pencil erasers is entirely too small (in my opinion). This is offset slightly by it not being they type that disappears easily. The push click mechanism is usable and gets thing done, but is a little underwhelming. And the clip is great, being smooth enough to not damage items but strong enough to hold on firmly, while the spring mechanism makes it easier to use and harder to break. But obviously the main attraction is the shake advance mechanism, which works as advertised. A good shake will advance enough lead for one to be able to write, though it might take two to get to a length most people are comfortable with. The advance per “shake” is comparable to the advance per “click” with minor length differences depending on some ethereal power (likely gravity and the external forces you apply). And the weight inside needs to reach both extremes in a short period of time with some force in order to advance the lead, this means that accidental advancement is a rare occurrence, but when intentionally done can be a surprisingly subtle gesture (though it’s still violent enough that people might give you strange looks). I haven’t had it advance in my bag, yet it’s always done so easily when I was using it.

photo 2-14

Without its gimmick this is still a solid pencil, though one could argue that its ¥200 (≈$1.75) price tag isn’t worth it without the shake advance (the same for its increased US price of $3.00-3.50) but even then it’s right on the line for the quality (though I wouldn’t get it without the mechanism because of its thickness). But with the mechanism it becomes a fascinating and usable utensil. The grip is comfortable, if wide, the lead and eraser are of quality, the clip is a step up, and the mechanisms work wonderfully. If you’ve been looking for a more convenient advance mechanism and other options like side advance aren’t doing it for you this is certainly something to look at. And while I probably wouldn’t have bought one for myself (it was a gift from my brother when he went to Japan), and indeed I won’t be keeping it in my daily use pencil bag, I had a fun time with it all throughout my testing.

Review – Faber-Castell Grip 2020 Ballpoint

Sometimes the basic problems of a cheap ballpoint pen can just get to you. Many ballpoints have a round or hexagonal design that can lead to hand cramping or slipping while trying to write with thick, uncooperative ink. You see additions like silicone rubber grips occasionally as a remedy in the US, but apparently in places like Peru they have attempted to remedy these problems directly in the design of the pen. The Faber-Castell Grip 2020 boasts an ergonomic triangular design, with as studded grip and “smooth writing” ink. But how well does that improve performance?

photo 1-7

The body is a simple, translucent, subtly triangular-ized cylinder with 150 small rounded “studs” for grip evenly positioned on the faces. The cap is round, with an integrated clip, and it has the relatively unique feature of sliding “under” the barrel rather than over it with the required step down being about the last quarter of the cap. Underneath the lip holding the cap in place there is a slightly tapered cone, friction fit over the ink tube; this cone can be removed, allowing the ink tube to be replaced. At the back there’s a stopper that steps down near the end, forming a space between it and the body where the cap can be posted. Over this stopper, on two sides of the triangle, there is written material: stamped in silver lettering is “Faber-Castell” and printed on a label is the barcode, model number, ink (and pen) color, and “Made in Peru”. I’m a bit disappointed by that, since, even though it’s on the back, labels on writing instruments have a tendency to get damaged and if that happened you wouldn’t know the model to get a replacement.

photo 2-5photo 5

Functionality is quite good. The cap both caps and posts securely while maintaining the “lines” of the pen (the pen flares out ever so slightly in the back so it doesn’t match up as well there, leaving a step down instead of a {relatively} smooth transition). The clip is fine but isn’t very tight and it slips on thin material (its attachment point and the plastic it’s made of are surprisingly rock-solid, though). The ink is smooth as promised, coming out of a very medium tip (broader than I like, to be honest). For all intents and purposes it is the same as the other Faber-Castell made-in-Peru pens, maybe a little bit darker, and with blobbing being present, but not nearly as frequent as the other models I’ve looked at (counter-intuitively {usually wider tips on ballpoints leads to more blobbing}).

photo 4-5photo 3-5

It’s a very nice little pen. For my personal daily use I prefer something shorter and with a finer tip, but this pen is comfortable, easy to hold, smooth writing, and doesn’t slip. I also really like the cap and how it doesn’t expand the circumference of the pen (save for the clip) and is probably less prone to crushing or cracking. If they managed to make the clip a little better, and offered the top in a fine I would seriously be looking to import some to use all the time. So if you’re looking for a simple, relatively inexpensive, comfortable, and durable (the plastic is very solid feeling) pen, and don’t mind importing, I’d certainly give this one a try.

Review- Ritepoint Chromatic

Every once in a while I like to take a look at something vintage and see how well it stacks up. Plus I’ve got a soft-spot for slim, fine (line) writing pens. Now I’m not entirely sure as to the status of the Chromatic (or Ritepoint, or whoever) but it does seem these pens (and refills) are discontinued, but easy to find online. Is it worth it to snag one?

photo 2 ritepoint

The pen body is very slim and stylish, reminiscent of the Cross Century. It’s a smooth cylinder, with a gold-banded break for the twist mechanism and tapers at the back and front. At the fron,t a third of the taper is in the form of a gold-colored metal cone, from which the point extends when the mechanism is engaged. The back taper terminates more abruptly and affixed to it is a fairly solid, basically flat clip that runs almost the length of the back section.

photo 3-1

The action of the pen is strange enough that I’m not sure it’s working properly. Turning the back half of the pen clockwise a quarter turn will extend the ballpoint and lock it into place. From there twisting will do nothing until enough force is applied counter-clockwise and the pen “clicks” at which point the tip will slowly retract completely. It’s an interesting compromise system and it works quite well. It’s just that everything feels a bit still and awkward. I can’t quite tell if it needs oil, is broken, or that’s just how it’s supposed to be.

photo 5

As for the writing, it’s quite good. My pen has a blue “microtip” cartridge installed. The ink is smooth enough coming out that I can write in cursive, though the lines themselves have some start-up and shading problems (oddly reminiscent of fountain pens). The line width is equivalent to, or slightly thinner than, most “fine” points and the ink properties are fairly standard. The only other function; the clip is better than average but nothing to write home about.

It’s a decent little interesting piece of history, but I wouldn’t say it’s essential for any collectors. And the impracticality of having to hunt down new-old-stock or second-hand refills or fashion your own out of whatever might fit makes it not a good choice for the regular user. If it sounds interesting to you I’d say go for it, but it’s nothing to run out and hunt down.

Review – Pentel GraphGear 1000

My favorite mechanical pencil is the Pentel GraphGear 500, but its MSRP is a bit close to my usual ceiling budget for new pencils, so I was reluctant to pick up its “big brother” the GraphGear 1000, until I saw one for a good deal. There are a lot of upgrades and features the 1000 has that the 500 does not, but is it worth the extra price (it usually costs)?

photo-1-1photo-2

If I was to give an example of an over-engineered pencil, the GraphGear 1000 would be that pencil. The body starts out pretty simple, with the back half being mainly cylindrical and having all the necessary information printed on it. The front half has the (grip) section that is very lightly knurled and has 24 embedded rubber ovals to increase comfort and grip. The “cone” in front of the section that steps and tapers down to the “lead pipe” screws off, allowing the section to be removed and reoriented. A small cutout at the end of the section (near the middle of the pencil) can then be oriented over a scale of hardnesses that are printed (stickered) around the inside barrel to show the correct hardness of the pencil (mine was preset at HB). Then the cone can be screwed back down to lock in the selection. (Otherwise the inner barrel is a smooth black plastic with a matte finish that isn’t really intended to be seen).

photo-3photo-1-3

The lead pipe usually featured on “drafting” pencils is curiously absent when one first inspects the item. It can be found by pressing the clicking mechanism on the end, at which point it pops out and is locked in place via a locking mechanism on the clip. Further clicking of the mechanism will extend the lead (or, by holding it down, allow the lead to be retracted) and pushing the top of the spring-loaded clip will release the simple locking mechanism and cause the lead pipe to quickly hide away in the cone again. The clicking mechanism cap can be removed to reveal an eraser, which can be removed to reveal lead storage. Both are friction fit with nice tolerances. And the mechanism’s cap has the lead size (.5mm for mine) printed on the top for easy reading when in a pencil cup.

photo-3-1photo-4-1

How well does all of this work? Very. Everything is solid, most of the important parts being made out of metal, giving it quite a heft when compared to the 500. The clicking and locking mechanisms are smooth, quick, solid, and satisfying to use. There is no play at all when using the pencil, and it tucks away perfectly (when the lead is retracted). The HB lead it comes with is standard. It’s bordering on the hard side of HB, but it’s still pretty smooth, and from using the same variety in other pencils for quite some time I can say it is reasonably break-resistant for the .5 size. The grip is surprisingly comfortable and the rubber ovals hardly noticeable (in fact they might not be necessary, or may even make it a bit more slippery than I would prefer). The clip does a very good job of clipping (mostly because of the cutout and spring present for the locking mechanism), and it slides off with very little damage from its well-polished edges (my model has a chromed-out clip for extra smoothness and flair I guess) and it being the locking mechanism means the lead pipe will retract as soon as it’s clipped on to something, preventing damage. The eraser is the same as the one on the 500, and it does a decent job getting rid of marks while being firm enough to not disappear completely.

photo-1-2photo-4

With that multitude of features and solidness of performance is it worth the price? Assuredly. But do you really need all of those features? Probably not. This is a great pencil and I’m really glad I was able to get one (even more glad it was at what I consider to be a really good price) but it just won’t be replacing the 500 for me (at least at the moment: only time will tell). I’m not really sure what it is about it, since it’s got a nice weight, a satisfying feel, good writing capability, and it isn’t ugly (though my model {the PG1015} is a silver color with chrome clip and button and I wouldn’t call it the most handsome pencil in my collection) but it’s just not right for me. Still, it is an astounding pencil at a very good price and if the features I’ve talked about interest you, or you want to move up in the world of mechanical pencils either as a hobby or an artist I can heartily recommend this as an excellent next step.

Review – Tombow Mono Zero Erasers

A few years ago I was aiding my brother in the search for a good separate eraser to go with lead holders (that often don’t have their own erasers), and that lead me to review the Sanford Peel-Off Magic Rub, which is essentially a Magic Rub eraser in the same body Sanford uses for their Peel-Off China Markers. And to me that was the answer. I knew there were mechanical erasers, but they were mostly cheap little things, or not available in the stores I frequented. It wasn’t until a few months ago that I found the potential simple, high-quality solution of the Tombow Mono Zero mechanical erasers and I got them as fast as I could. Are they up to the task?

photo-2photo-1-2

The body is super simple, being a cylinder about the size of a pencil and a little over 3½” long. It comes in 2 different colors: silver for the round eraser, and black for the rectangular one (it’s made of plastic either way). At the front there is a step-down to the “lead-pipe” of sorts. This “pipe” being cylindrical for the round and flattened for the rectangular is the only other main physical difference between the two. The (lead/eraser) pipe is a nice, stiff metal that cleanly guides the eraser as it extends. On the back, there is a non-removable, simple push-click mechanism with an integrated clip. The clip is good but not superb at clipping, while having the advantage of being very structurally sound (something most plastic integrated clips are not). On the top of this mechanism is a sticker with the eraser’s sizes: 2.3mm in diameter for the round “small” and 2.5mm x .5mm for the rectangular “slightly less small”.

photo-2-1photo-3-1

Performance is good; the click mechanism is sound and has a satisfying feel, retracting and reloading are simple and both done from the front end (reducing the number of failure points but also making disassembly functionally impossible). The erasers are of the white variety and erase very well. They aren’t the absolute best I’ve seen and they won’t get rid of every single mark, but they are both quite tiny and precise, making them very useful in those fine detail areas other eraser wouldn’t even be able to get to.

photo-4

They are very good erasers, but more as a set to complement others than on their own. For writing, pocket and backpack sketchbooks, or those who do a lot of detail work, they will be fantastic, especially if one gets both to use in different situations. But for general use, they obviously don’t have the huge, quick-erasing capabilities of a standard eraser, and I’d imagine that in most people’s use cases they’d augment and not replace one. Still, I am one of those people who like to write and do finer-detail drawings more often than other types and they have earned a place in my pencil bag that I don’t see them moving out of any time soon. So if you’re looking for a fine mechanical eraser to easily carry around, fit in with your pencils, or do detailed work, I’d say take a look at these.

Comparison – Wite Out Quick Dry/Extra Coverage/Super Smooth

Previously I’ve compared the two major brands of correction fluid: Liquid Paper and Wite Out. Back then I didn’t take a look at the fact that Wite Out comes in a few different kinds (but there is one that is basically “regular”), so I’ll attempt to rectify that this time. Now, the various “flavors” of Wite Out do go in and out of production, with the majors being “quick dry” (regular) and “extra coverage”. I also have a bottle of “super smooth” that I picked up second hand and surprisingly still works (it’s old enough to have the previous graphic design) but that type is currently out of production. How do they compare?

photo-1-2photo-1-1

Quick Dry – The standard of correction fluids and one that I’ve looked at before. Quick Dry is fairly “standard” in properties; it dries shiny and little warm in hue (yellow-ish). It is a bit finicky and tacky, sometimes making it difficult to get a smooth finish with multiple strokes. It covers regular pen, pencil and stray marks well (though it sometimes leaves a divot where the ink “repelled” it. But on darker lines like those made by Sharpies it only minimizes the effect.

photo-4

Extra Coverage – The other currently (easily) available Wite Out, Extra Coverage is smoother, dries matte, and is colder (and much more white) in hue. From my experience it layers well, always being fairly flat, even minimizing visible strokes. It covers pens and permanent markers with ease (though it’s still got that weird divot displacement thing going on) but doesn’t blend in as well with the paper. And, though I did no super thorough testing, it actually seems to dry faster than the “quick dry” or at least not remain tacky as long, but that could be because my “quick dry” bottles are older.

photo-2

Super Smooth – Being no longer available I have no idea what a “brand new” bottle of Super Smooth would be like, but I would hope it’s better than what I’ve got here. The bottle is old enough that it has a brush (not a sponge) applicator, and that’s not an asset since this particular type is very fond of clumping up. It’s visually similar to “quick dry” but more matte, and it doesn’t cover nearly as well (it just makes things look kinda hazy) forcing one to reapply it, causing many clumps and visible brush strokes. It dries much slower than the other two as well (maybe that’s why it lasted this long) and while it may be “smoother” in the technical sense I don’t see that as much of a positive either in the abstract or the comparison.

photo-3photo-3-1

If I had to pick a winner it would be “extra coverage” as the only flaw I see in it is that it doesn’t quite match the color of the average sheet of paper. The “regular” “quick dry” is still a good product but one I will be using less often now. It depends on whether or not you want the correction to blend in or completely cover up the mistake. But if there is one thing to take away from this, it’s that I now understand why “super smooth” was discontinued.


Review – Swingline Tot (Mini) Stapler

I’ve been using an old Swingline CUB stapler at my desk for years now. The combination of small size and standard staples makes it perfect for me, a person who doesn’t have to staple often. I also have the super small Tot-50 stapler in my pencil case, and while the size is good it does use a different type of staple to most other staplers. But now Swingline has a middle ground even between those two with the Tot, a stapler that is just about as small as you can get while still using regular sized staples. But how useful could that be?

photo-255photo-256

The Tot is about 2½” in total length, 1¾” tall, and 1¼” wide. These measurements are a bit larger than they could have been due to the rounding of the stapler body; there are no sharp edges on it. At the back there is a curved piece of metal sticking out to serve as a staple remover. It works fairly well, though unlike the standard “jaw” type it does have the tendency to fling used staples across the room. On the top and bottom of the main body there are relatively comfortable divots in which to place your fingers when stapling. And the entire thing is a sort of teardrop shape, narrow in the back and widening near the front before suddenly dropping off.

photo-259photo-260

Underneath is a small rubber “plate” (for lack of a better word) covering with a handy mark representing staples stamped into it (in the previously mentioned divot), though if I didn’t know they were supposed to be staples I wouldn’t have figured it out. Peeling this back from the nice little nail nick (it’s held in place with tabs in slots) reveals a small storage compartment with enough space for a regular block of standard sized staples, and enough space for (someone with smaller) fingers to get in and grab it. Below these staples is the general information about the product, save for the brand name which is proudly displayed on top. This rubber piece is fully removable, though it is a bit finicky to get it past the staple remover on the back both when getting it on and off. I can also say, from a spill on my desk, that the rubber seals well enough to be water resistant (but I wouldn’t count on it).

photo-261

photo-257

As with most Swingline products stapling is as easy as can be. There’s a surprisingly good amount of leverage in this design and it connects pages cleanly and neatly together. Its use of regular sized staples and a mouth about as wide as your standard desk stapler means that it will basically perform the same function, with its only limiting factor being capacity (and durability since it is made of mostly plastic and most staplers are metal). My only general complaint is the top; it’s quite easy to open and hinges back far enough to make loading a breeze, but the tab that holds it in place when it’s supposed to be locked down is very weak and I’ve found it to pop open with slight provocation, or even without provocation at times. And that’s slightly worrying: I don’t want staples everywhere. But the spring holding it down is fairly strong, and if kept on the desk or in a case this shouldn’t be a problem.

photo-262photo-263

So, if you’re not one that staples often, have limited desk space, or want to carry a stapler with you but not special staples (but maybe with a bag or case) this little guy will work great. It’s small, easy to use, and gets the job done. It isn’t as durable as the larger versions (or its metal predecessor the Tot-50), but with care it will work for a long time (but maybe not as long as my CUB) and for how inexpensive they can be I’d say they’re definitely worth it (and they come with a box of staples, which is cool).

Review – Caran d’Ache Sketcher (Non-Photo Blue Pencil)

Pencils are a nigh-indispensable tool for the artist. But usually, especially with ink work, they need to be erased, and that can be a hassle. It’s a lot of work, it risks ruining the drawing (or paper), it takes time, and it becomes harder to correct later. But oftentimes the final work is either a duplicate of the original, or more work is done over inked lines, meaning that using a pencil that simply doesn’t show up in the reproductions saves time and work by not needing to be erased. Non-photo blue pencils were used for this purpose as many image replication processes (mainly cameras and photocopiers that were used to duplicate artwork for printers) have a hard time transferring it, and they still retain a place with modern scanners that will be able to pick the color up, but do so in a way that the image can be easily edited to omit it. But is it really worth it to get a new different pencil like the Sketcher from Caran d’Ache?

photo-264photo-258

The pencil is as basic as one can get: made of wood and hexagonally faceted to limit rolling, one end is sharpened the other has a metal ferrule connecting the body to an eraser. The body is a pleasant blue color mirroring the color of the lead and on one facet neatly stamped and inked in white is all of the relevant information. It looks and feels very much like a standard #2 pencil.

photo-266photo-267

The eraser is well done; it erases cleanly and is dense enough to not float away far faster than the rest of the pencil. The lead is hard to place in hardness; it feels softer than a standard HB but it has a more waxy quality (characteristic of colored pencils) that makes it give a much harder line. So it writes somewhere harder than HB and wears somewhere below. The line it produces can go from very light to surprisingly dark, but even at its most dark, it is barely visible in scans and can be easily isolated and removed. But it is only a tool for pure ink drawings, and its use is limited in other senses. If one were to, for instance, lay a wash over it, it would be harder to isolate and almost impossible to be rid of on scans, and it resists being covered by lighter washes. And if one were to erase before laying down a wash they would find that the ink laid on top of the pencil is cut down severely, with the entire line becoming grey and having several holes that are almost white, basically where the ink adhered to the pencil and not the paper (this effect is present, but much less severe, with standard graphite pencils). A similar set of problems would be encountered by someone wishing to put color down. So using a pencil like this would necessitate an additional step between inking and coloring/washing where the inked drawing is reproduced and tweaked to eliminate the blue (and potentially other errors).

photo-268

I’ve also had a bit of an issue with the lead being soft enough to break inside the pencil. It hasn’t been severe, but it’s worth noting.

photo-265

So am I converted to the blue pencil? Not quite. I really like it, and for a specific type of work-flow it is perfect, but that work-flow isn’t mine. I color/wash my original drawings, and I don’t see that stopping unless I get big enough that I can hand it off to someone else. So the pencil has very little use inside my work environment. I do use it now and again, but it also wears down quite quickly, and having to use a sharpener just drives me back to my mechanical pencils. That being said, it is a well-made pencil that does its intended job superbly. If you need to reproduce or scan in original inked artwork and don’t want the hassle of erasing, I would say this is right up your alley.